Select Category

Add DIY Bedroom Furniture Ideas With A Wooden Headboard
Wooden headboards are quite popular and add a rustic aesthetic to the space. Our first DIY furniture idea is this headboard that’s simple to design and yet expensive to look at. Complementing it is a matching side table. All you need is light-coloured plywood and an old fruit crate. Drill or nail the plywood to the back of your bed that becomes a headboard, while an old fruit crate placed next to your bed acts as a side table. Additionally, you can decorate the box with some candles, coffee mugs and miscellaneous items for subtle aesthetic warmth. This is an excellent DIY bedroom furniture idea for those who fancy rustic-style interiors or want to add hints of this style to their otherwise dull bedroom. DIY Furniture Tip: Add some freshness to the space with potted plants, fresh paint on the plywood and a hearty coat of varnish to eliminate splinters.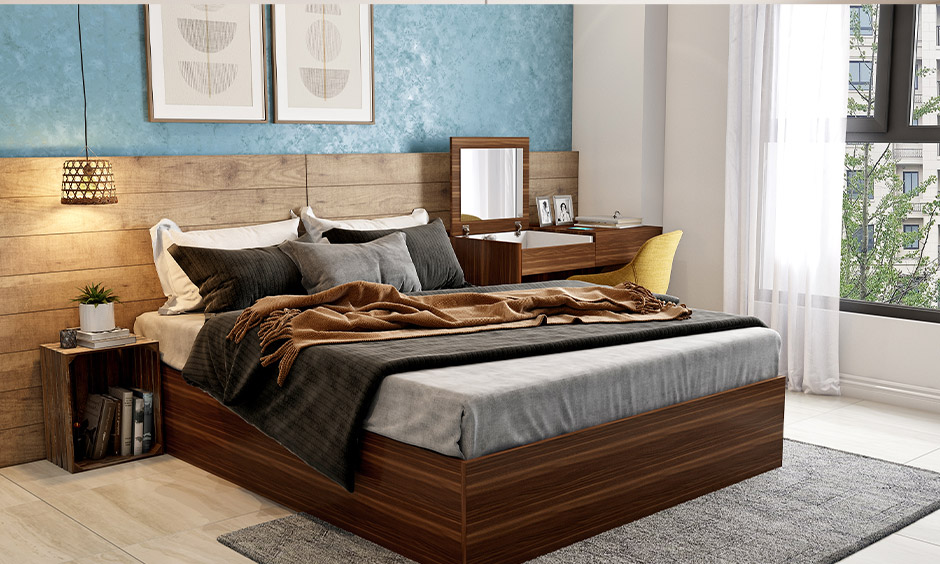
A DIY Furniture Idea That Helps With Your Storage Problems
Your hardware restoration goals just got a whole lot more achievable. If you want a unique shelf to make a statement to your living or dining area, here is our DIY furniture idea. All you need is some wooden planks, adhesives, nails, and a drilling machine to get started. Collect decor pieces you want to display because this shelf will be ready in no time. The wooden planks are perfect as floating shelves and a sturdy companion for those who love books, decor and everything in between. DIY Furniture Tip: Sand the wooden planks and polish them with the wood touch you choose to give them a rustic vibe while protecting the wood.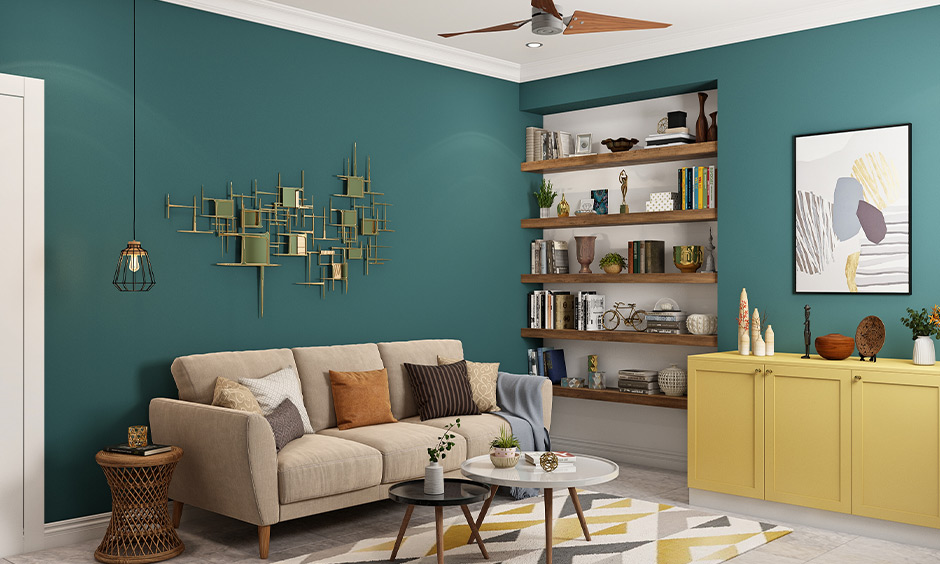
A Unique DIY Furniture That’s Perfect For Your Brunch Space
A DIY furniture idea that sets a table of two for brunch? How cool is that? Here is what you need. Wooden crates, a cable spool, some wooden discs and a plyboard. Place the crates on the floor one topping another. You can also stick them together to make them sturdier. Place a plyboard behind this structure as shown in this image. Additionally, you can drill a wine rack into the plyboard to hang your glasses. For the table, look into cable spools and use it as a makeshift table for your brunch and coffee hours. If a spool isn’t easily accessible, you can attach two round wooden cutouts to a cylindrical base to make a spool table. DIY Furniture Tip: Potted plants and biophilic decor bring life to a space. You can complement it with a crate. Buff it, followed with a paint or varnish of your choice, and you are good to go.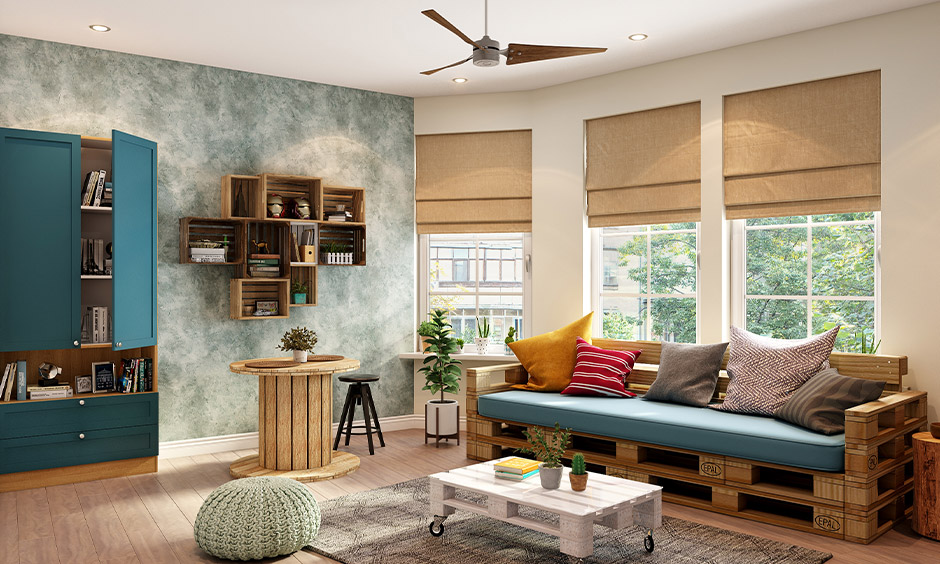
A DIY Coffee Table And A Ladder Rack
A unique DIY furniture take on the coffee table design backed by a smart ladder rack to store your snacks and munchies! To give this cool DIY coffee table shape, you need four crates, two pipes or bamboo sticks and small wooden planks for the ladder rack. Place, drill or paste the back of all four crates to be accessible from each side, as shown in this image. You can use the open sides to stack magazines, books, TV remotes, pots and fruit baskets. The top can be used to place hot coffee mugs or cute decor. Coming to the ladder rack, paste or drill the planks between two pipes or bamboo sticks, forming a ladder. Keep your jars of snacks, cutlery and coffee mugs as shown in this image. Additionally, the ladder rack can double as a bookshelf or a shelving space for additional storage. You can also choose to use it for displaying your decor elements, prized possessions or simply plants. DIY Furniture Tip: Paint these DIY pieces in striking colours to bring a pop shock. Add fairy lights and indoor plants to make your space more appealing. Or stick to neutral natural tones for a warm cosy visual appeal.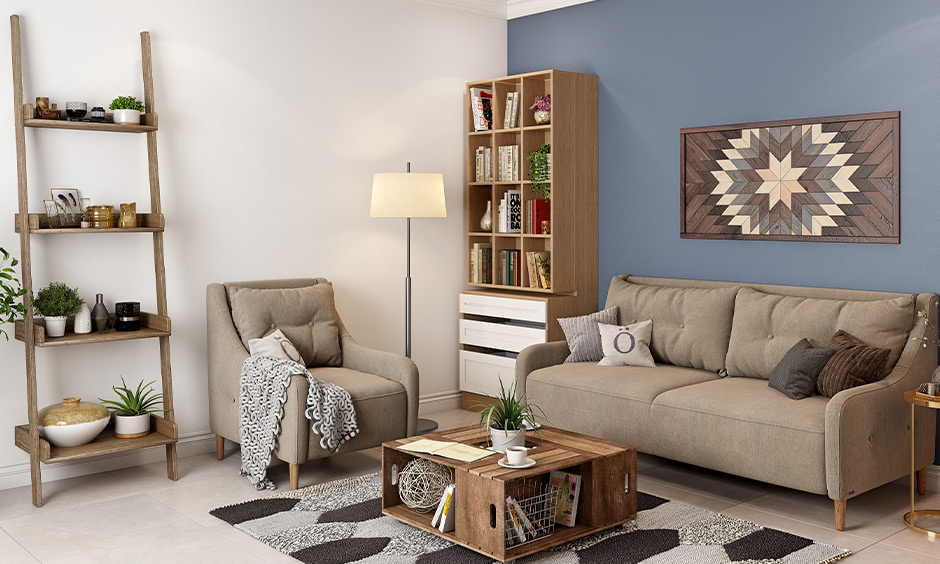
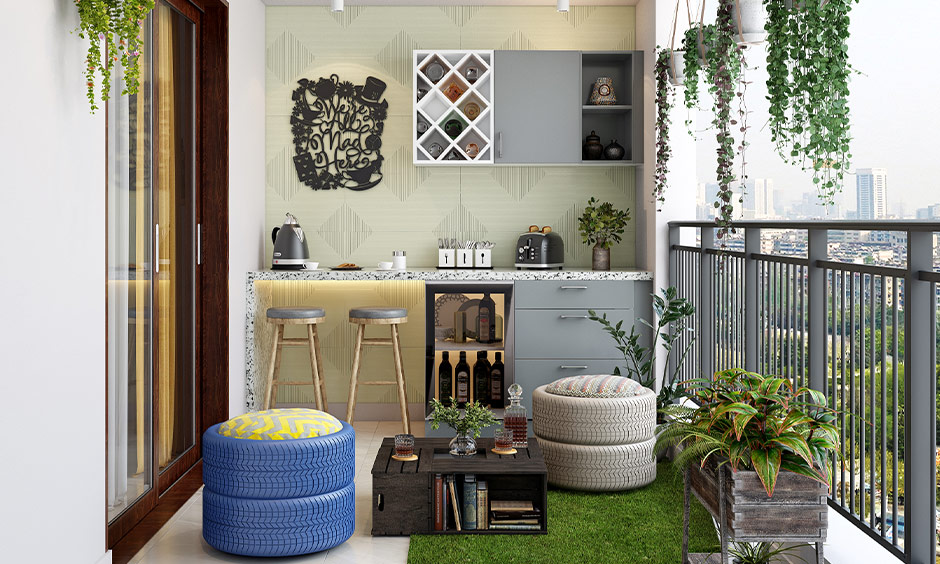
A DIY Furniture Idea That Brings Your Patio To Life
For the adventurous lot among you who have a knack for engineering, it’s time to get some work done! Design a unique yet comfortable settee for your patio or garden area. You simply need some tyres, comfortable cushioning and tools to staple and drill, and some colours of your choice. These kinds of seating are perfect for your patio or balcony space. You can also DIY these seats with wooden barrels if tyres aren’t easily accessible. DIY Furniture Tip: Paint the tyres/barrels before adding the cushions for a flawless finish. Get rid of old paint with the help of sandpaper. Use spray paint that contains primer to prevent your DIY furniture from rusting.